Site Meter

Wednesday, March 31, 2010

Teaser: swatches new Catrice polishes

3 comments
Dear Lacqueristas

Big fat rainy clouds these days but I will tease you with some quick swatches in artificial light. You will get the real deal as soon as the sun comes out, so keep an eye on my blog ;-)

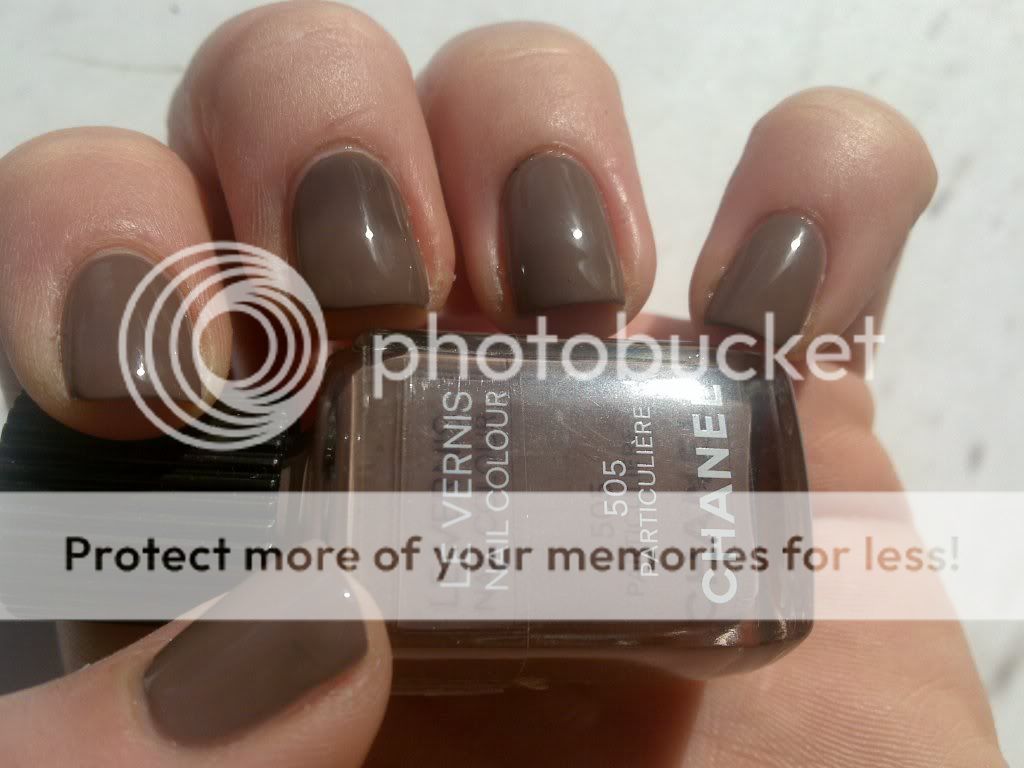
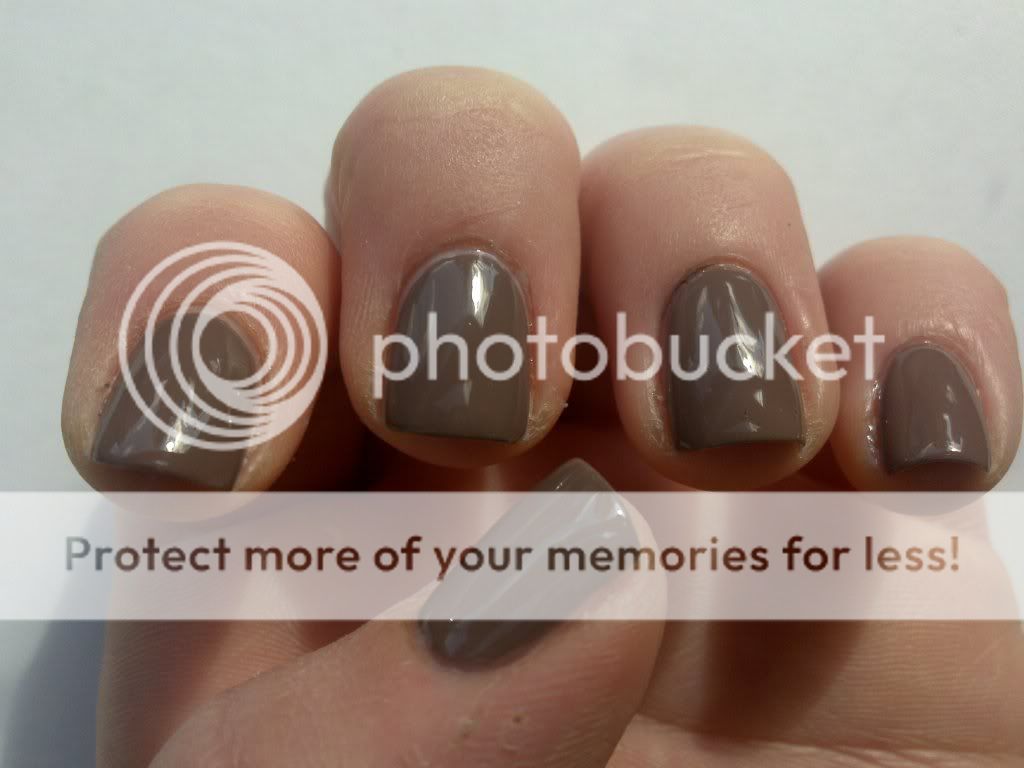
The taupes: pink 200, ring 230, middle 300, index 290, thumb 220


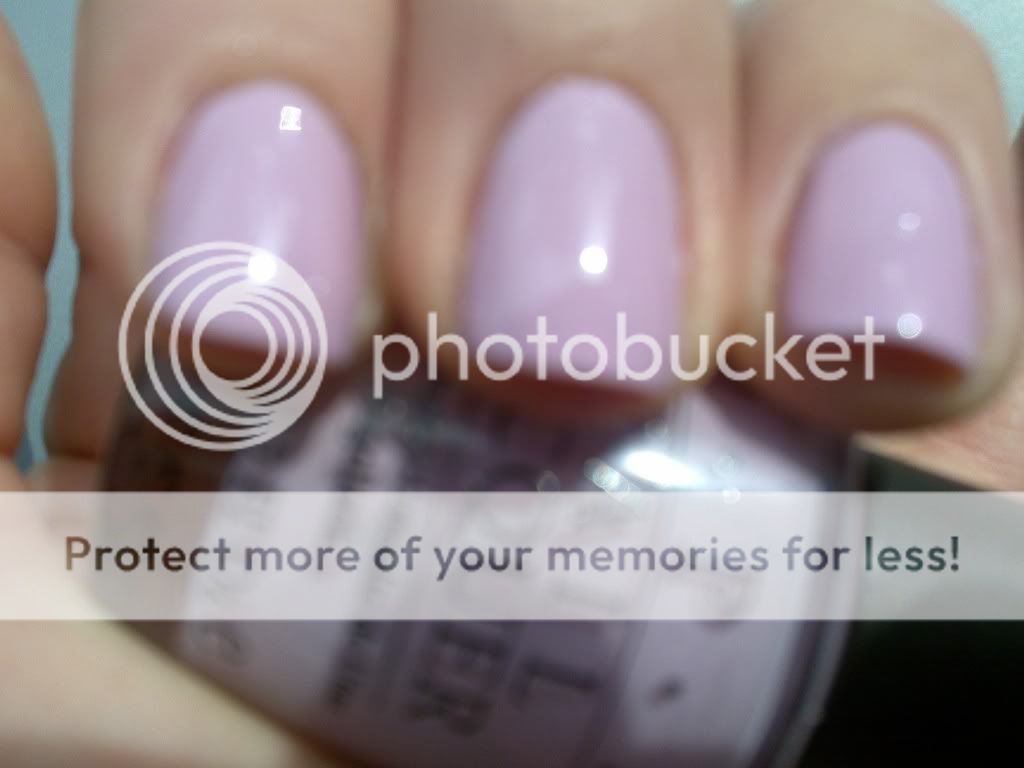
The purples: Pink 110, ring 130, middle 120, index 190, thumb 100.


The greens/blues (and a yellow): Pink 260, ring 240, middle 250, index 010, thumb 270

My favorites so far:
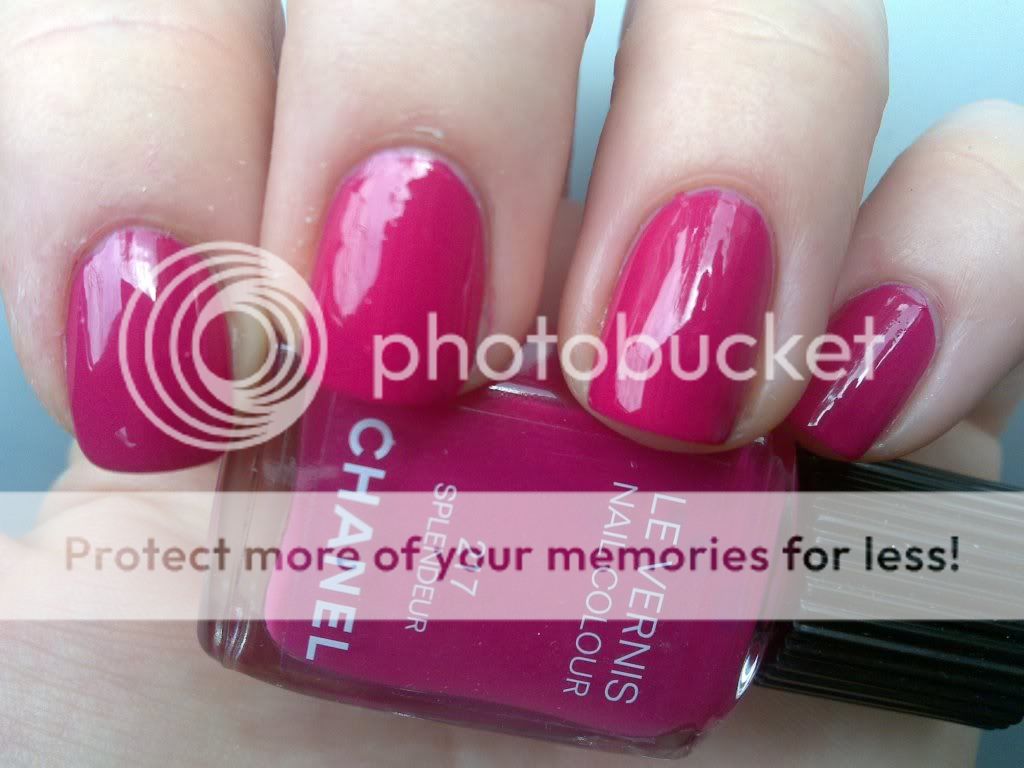
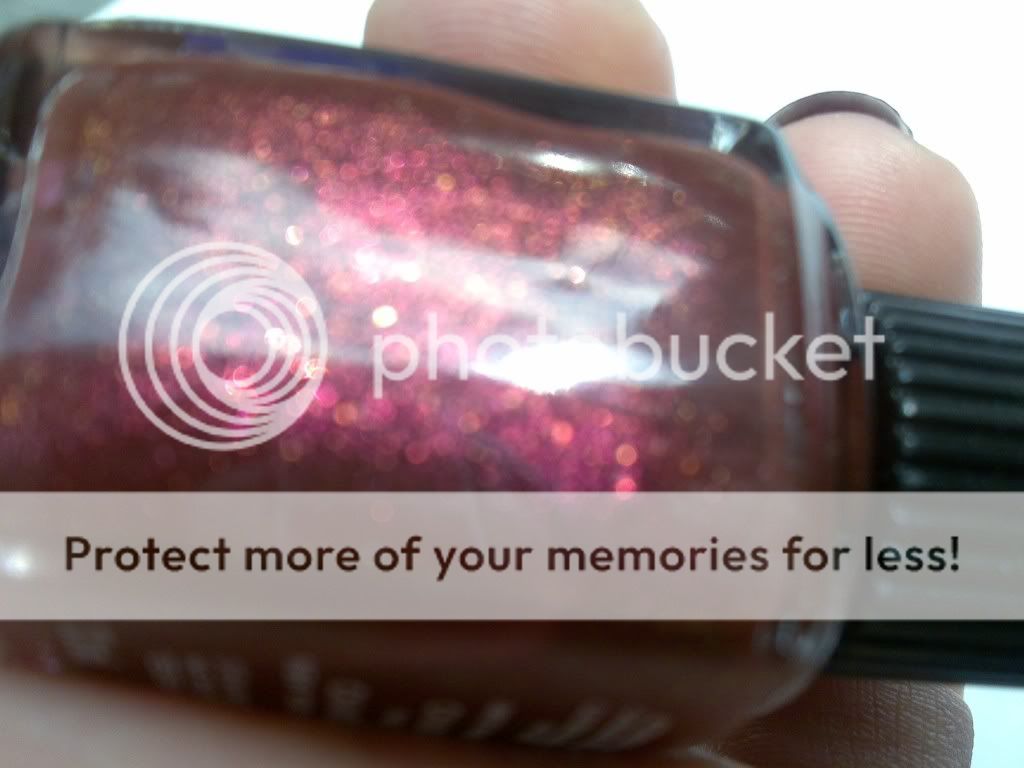
100 (vampy with the most sexy burgundy shimmer/micro glitter)
190 (Magenta with a blue simmer)
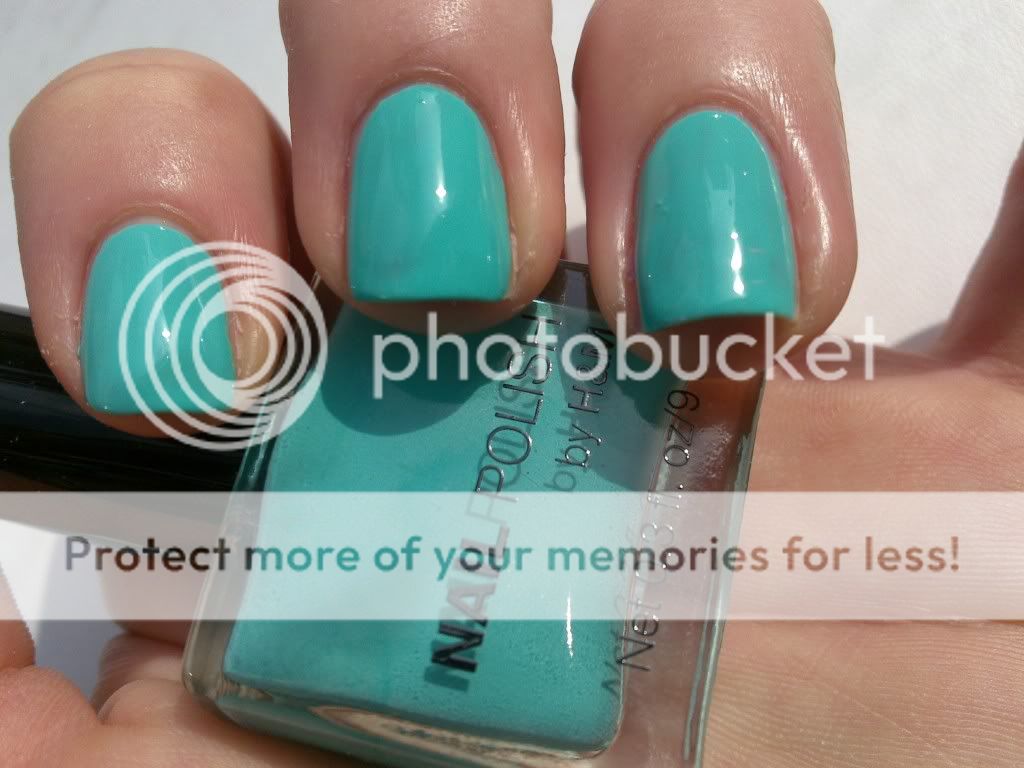
260 (a teal/turqoise with silver blue shimmer)
I'm sure many of you love the taupes as well. Three taupe polishes in a collection of 30, that means you can find your perfect shade. I have seen a clay-ish taupe with a shimmer (yes really, a SHIMMER in a taupe), a taupe leaning to purple and one leaning brown.
Catrice defenitly jumpes on the bandwagon here considering all the dupe-ey taupe and mushroom colours... In fact I think I could find the dupe in any of these polishes. But that's not a bad thing per se!

*I see now that it totally showes that I didn't apply a ridgefiller... So excuse my ridges please! Nest time I'll make swatches I'll make sure I do it right ;-) *
So far for these Catrice teaser for now, Í pinky promise that I will review and swatch all of them soon! 

Remember, I do swatch and compare on request so let me know wich Catrice polishes you want me to swatch first and what you want me to compare it to.

Hasta la vista, Laqueristas!

mega haul: new catrice polishes!

4 comments
Dear Lacqueristas,

Yesterday I just happened to be in my local drugstore when they were implementing a new polish display for Catrice. This is a brand I've never even tried before as I'm lucky enough to receive name brand polishes in general. I just never really get in drug stores to check out their make-up and polishes, I just to there to get what I need (toothpaste etc) But! These polishes where simply calling my name! A wide color range and totally hip. Best of all: 2.50 euro per bottle. And for the dutch girls: Kruidvat has an offer of 30% discount on all make-up this week ;-)

I'm very sure Catrice build this new collection by dupe-ing bestsellers and sought-after polishes by name-brands. One example: the light mint-green polish has a beautifull subtle shimmer and is called sold out forever and is supposedly a closer dupe to Chanel Jade then Claire's Dreamcatcher.
Many polishes in this collection have shimmers/duochromes so I can only swatch when the sun decides to show her pretty face. So keep an eye on my coming posts....

Hasta la vista, Laqueristas!

Tuesday, March 30, 2010

Chanel Splendeur + comparison fuchsias

3 comments
Dear Lacqueristas,

A few days ago I blogged a mini haul about Chanel Splendeur. I'm gonna show you why I am so exited:
Isn't that bold and pretty?

I just always fall for fuchsias, the bolder and more blue, the better. Looks very flattering on my fair cool skin and I love to match it with the lipstick (I love to use YSL rouge pur #19)

This particular polish is leaning to purple, kinda like OPI's Dim Sum Plum. Like most Chanel polishes, very good formula, opaque in 1 coat but I applied 2 out of habit. Easy formula to work with.
Check out the comparison:


I don't have any dupes to Chanel Splendeur but this comparisation might just help you see how it compares to other polishes.

I hope you all enjoyed this swatch, if you want me to compare it to another np, let me know! 

Hasta la vista, Laqueristas!

Monday, March 29, 2010

My very first marble... and it didn't hurt!

5 comments
Dear Lacqueristas,

Today I had my very first marbeling experience... I felt so inspired by all those pictures I've seen on other blogs for ages but I was sure that it would be to hard for me. Turns out that it isn't that hard at all, it just takes some time and practice. I'm sure I need to practice a lot more because some of my nails are messy and others look just fine. What do you think? My favourite is the left thumb and the left ring finger.

I just made sure you wouldn't be offended by my cuticle on my right index finger


Close up of right hand. I think the thumb and ring finger came out nicest.

I Used a cheap nail polish from H&M as a base, it's called Fuchsia but I don't think it's available anymore. I'ts similar to OPI Dim Sum Plum. For the actual marbeling I used:
  • ChG High Hopes
  • ChG Re-fresh Mint
  • OPI Suzi says Feng Sui
  • ChG Lemon Fizz
Do you girls like this? And how do you make sure your nails don't get messy like mines??? Clean-up after was a total bish!


Hasta la vista, Laqueristas!

Sunday, March 28, 2010

China Glaze - Re-fresh mint (Up and away)

2 comments
Dear lacqueristas,

I'm all into pastels lately and thats the reason I purchased this next polish. Re-fresh mint is a mint creme, the color is a pastel green with blue undertones. Application was not perfect, the polish was a bit gooey and streaky. I had the same experience with High Hopes from the same collection, too bad!
I didn't realize how unflattering a minty shade can be on a skin with red undertones... Just have a look to see what I mean:

3 coats, no topcoat. In direct sunlight.

It's such a shame that I feel like a big red lobster claw with this shade on my tips, because I'd totally rock it with a chique black outfit.


Close up in daylight, no sunlight

Who could pull this minty shade off? And how would you style your outfit to match it?

Hasta la vista, Laqueristas!

Friday, March 26, 2010

Quick haul! Chanel splendeur!

Comments
Dear lacqueristas,

I'm very busy these few days but I need to vent that I finally got my hands on Chanel Splendeur and I'm so in love with it! I will try to swatch and compare soon! Any requests for comparing?

Hasta la vista, Laqueristas!

Thursday, March 25, 2010

H&M Bella's choice

2 comments
Dear Lacqueristas,

This next polish is apparently not available in the US wich sucks because I only have US followers so far. But this polish is so cheerfull, I just had to swatch! If you really really want to have one too, you can conact me to see if we can swatch (Claire's color changing np's anyone?)


H&M Bella's Choice. Turquoise, creme, what more can I say. Applied ok but in the pic I notice some bald patches so I should have done three coats instead of two. I think this color is so cheerfull and bright, can't wait for summer! I think this would also look beautiful layered with a shimmery sheer like OPI's Pearl of wisdom. I'll swatch this next time we get sunlight.
What do you think, Konadding, layering? Or just leave it as it is?

Hasta la vista, Laqueristas!

Wednesday, March 24, 2010

Chanel Gondola and Intermezzo: Part 2

Comments
Dear Lacqueristas,

This next polish is so sexy. I got this bottle because it looks so unique. In the bottle you can see clearly that this polish is not just white, it has the most intriguing sheen. It somehow reminds me of the ring I saw at an antique jewellery, that I keep harassing my boyfriend about. The ring is made of white gold with a huge fire opal surrounded by the most precious diamonds.... I didn't get it though (not yet? Would he read this? :-S )

This is a polished fire opal. Isn't this just precious?! I wonder if here would be a nailpolish (a flakie!) that has all these colors in it... I'd be a fan!

Anyways, we were talking polish. So here you go:

In sunlight, color appears warmer then it actually is.

Also sunlight, here you can see my difficulties with applying (streaky)


This is in artificial light, but more color accurate. It enhances the cool white base color and on the pinky you see a slight pink sheen (it was trying to hide though)

Even though I love love looooove this color, the formula on this one was not so great at all, I noticed some bubbles and after taking it off and re-applying I would still see some bubbles. Also, the color was pretty streaky and even after 3 coats it was not perfectly opaque. If you want to wear this polish as a mani, I strongly advice you to apply 2 coats of ridgefiller. I will wear this on my vacation to the caribbean, nothing enhances a tan more then a color like this!

Now you've seen both Gondola and Intermezzo form the Chanel fall collection. Wich one do you like better? And why? Would you buy any of these?

Hasta la vista, Laqueristas!

Tuesday, March 23, 2010

Chanel Gondola and Intermezzo: part 1

2 comments
Dear Lacqueristas,

Today we had a few minutes of sun again, so I was able to swatch two stunning Chanel polishes that came out as a pair in fall 2009 as a part of a maquillage look. So I am pretty late, but I still want to share these beauties with you.
These polishes really needed the sun to be able to catch a glimpse of the glitter and sheen.
Today let's start with Gondola:
A red/purple burgundy with a brownish hue to it. Packed with beautifull small glitter particles. It looks like the glitters are gold and most of all red.

Just look at this bottle bursting with delicious micro glitters


Sunlight

*Wow*

Blurred out to show you the two toned glitter: Gold and red.

I think it's a very nice polish, not so much the color but the chique glittery crushed rubies effect is very pretty. The color does not flatter my skintone and I think honestly it would only suit warmer toned lacqueristas. The formula on this polish was great, the glitters don't give a rough finish but the surface feels smooth as if you were using a creme polish. I applied 2 coats and no topcoat.

Tomorrow I will show you part two: Intermezzo.


Hasta la vista, Laqueristas!

Monday, March 22, 2010

OPI Hong Kong collection-Panda-monium pink

Comments
Dear Lacqueristas,

More Hong Kong collection! Today I have Panda-monium pink to show you.
Please lacqueristas, forgive me the blur. I just got too exited about this color

This polish was a pain to apply, pretty streaky and for some reason it kept running to my cuticles. But it is so worth it, just look at it! A creme pastel pink with a lilac tone. This color doesn't look sweet to me at all. I would totally wear this as a pedi with some mean leather strapped heels *Balmain style*
I wish it would be more flattering for my skintone though... What do you guys think?


Sunlight

Close-up  in sunlight

That's it for today, my dear fellow lacqueristas! I'm so thrilled to see more and more page visits! Any feedaback on my pics, posts and picks is more then welcome!

Hasta la vista, Laqueristas!

Sunday, March 21, 2010

Chanel Particuliere

Comments
Dear Lacqueristas,

Here in Amsterdam the sun was finally shining, so I was able to swatch this polish accurately for you. I present you le vernis a ongles Particuliere de Chanel. Yes, this baby needs a fancy introducion. Let the pictures speak for themselves.

Direct sunlight

Overcast

Sunlight, different angle

According to Wikipedia:
Taupe is a vague, unscientific color term which may be used to refer to almost any grayish-brown, brownish-gray, or warm gray color. It often overlaps with tan and even people who use color professionally (such as designers and artists) frequently disagree as to what "taupe" means. There is no single, generally recognized authority for such terms.
So in the color taupe is actually in the eye of the beholder. To my eyes I would say it's a clay-ish, brown/grey color with a hint of lilac. I would consider it a neutral and it has a chique sense to it. Texture wise it's a creme, and application went flawless. A must have!

Hasta la vista, Laqueristas!

Thursday, March 18, 2010

OPI Hong Kong collection-Suzi says Feng Shui

3 comments
Dear Lacqueristas,

Suzi and the lifeguard, Suzi sells sushi by the seashore, Suzi skis in the pyrenees, Suzi says da! And now Suzi says Feng Shui... Have you guys ever wondered who this Suzi is? I always did but then I never actually looked it up. I think I got the answer now... It has to be Suzi Weiss-Fischmann, the Executive Vice President and the Artistic Director of our beloved OPI. Turn out she is the one that personally creates all colors! What a PHANTASTIC job that has to be!

Anyways ladies, I promised you Feng Shui, so here we go.
A strange color, medium blue with grey undertones and a tiny brown hue very far in his genes.  A slightly tauped blue, if that makes any sense. This makes the color unique and I'm sure that if there were blue polishes in the roaring twenties, it would be Feng Shui.
The formula was great, but as you have probably read or discovered yourself, smell like hot ass.


Overcast *edit: applying polish with an OPI mini brush is only for skilled people. I'm not :-P*


Mattified with ChG magic matte. *edit: please dont click the pic to enlarge. It will cause a pain in your eye. Damn mini brushes*

How would you describe this color? I'm sure you can do better then me! Leave us a comment with your description, let's see who can nail this.


Hasta la vista, Laqueristas!

Wednesday, March 17, 2010

OPI Hong Kong collection-Red my fortune cookie + comparison

Comments
Dear Lacqueristas,

Today I had a look at Red My Fortune Cookie by OPI. In your face RED it is. Super bright and pretty!
Two layers, no topcoat in daylight

It is a creme red. But. B.R.I.G.H.T.  I'd call this a fresh red and I just know that this will look extra awesome if you wear a black and white outfit, with a matching lipstick. Mind you, let me go look out for the perfect lipstick to match this shade... Move over Dita von Teese!

Daylight, overcast. The Off with her red looks so out of place in this comparison, just ignore that ok. Plus it stands out so uber unflattering.... I don't like that one at all, if you want to have it (it's a mini though), let me know.

This color actually reminds me of a polish by Yves Saint Laurent (those are excellent, I dig their thin formula) If you want me to dig it up to make a comparison, let me know ;-)


Hasta la vista, Laqueristas!

Tuesday, March 16, 2010

China Glaze Sexagon

2 comments
Dear Lacqueristas,

I think most of us lacqueristas know how to appriciate a good holo. Most of you probably own some, and I think Sexagon is one of the bestsellers when it comes to holo's.
It is a clear base (really!) with very fine, tiny flakes of holo's. The main colors of these particles are silver, but they flash blue, orange, green and purple depending on the angle of the light rays. The formula on this is great: dries super quick and finishes without a grainy feeling!
I played around a lil bit with it, and I figured I'd show you the results

Daylight, no direct sunlight. See how it looks just plain silver/grey? No holo to be seen! Untill....


...You get direct light (in this case the flash) to hit the polish. Mind you that holo's are extremely hard to catch on picture, so IRL the holo is much much more!

check out the comparison pictures after the jump.

Alice in wonderland collection by OPI

Comments
Dear lacqueristas,

I want to start off by saying this collection made me very happy. I can't believe my luck that the mini collection comes with 4 polish shades, that is in this case the entire collection. I never like the OPI mini's because they usually do 3 polishes and 1 topcoat (that I won't use) and in most cases I don't even like all the polishes. In this case, I was in total awe with 2 of them, loving another, but the 4th...mehhh. Anyways, I'm happy to see OPI doing what they do best: delivering top notch products and shades. One complaint though: those mini brushes don't polish neatly at all!

Absolutely Alice
Ohhh Myyy Goshhh this is hands down the most dazzling polish I have ever seen IRL. In the bottle it looked beautiful, but only when you've applied it on the nail and see it glisten in the sunlight, you will what I mean. I wore this as a full mani a few weeks ago, and I couldn't stop to gaze at my tips. I felt like that bird that is lured by anything that blings... I went bananas again, just by swatching it! Crazily pretty polish!
The polish is a clear base with blue glitters. I'd say the color is somewhat between medium blue and royal blue. But the best thing is: in between the blue glitters, you will find speckles of golden glitter! The combination of the two makes this polish super special.
This polish reaches opacity in 3 coats. Very unusual for a glitter polish!


Absolutely Alice defenitly stands out and gives you a bling like never before. The glitters are small and round so it will not look tacky or cheap. This is a glitter that we, grown ups can wear! When I wore this mani I chose to apply 2 thick coats of Seche Vite so you can't feel the grainy glitters, and I didn't feel like it effected the sparkles in a negative way. In fact, the color got intensified and the glitters shined ever so sparkly. It gave it a 3D effect.
I found this polish very hard to photograph. Believe me that this polish is 10X prettier IRL.


3 layers, daylight, no direct sunlight, no topcoat exept for the index finger on wich I applied a thick layer of Seche Vite. See how it intensifies the color?

Blurred to enhance the glitters. Isn't it AMAZING?! *sighs*


Mad as a Hatter
A pretty unique multi coloured glitter in a clear base. Like the Absolutely Alice, in this formula OPI used small round glitters so it will not look tacky. The polish has a lot of different colored glitters: I detect gold, orange, green, magenta, blue and most of all silver. I think it's a nice polish and all but it's not my cup of tea *lol-->Alice in wonderland*

In direct sunlight

Shade
Blurred to enhance the glitters
Sunlight

click on the read more button below to see the rest of this review

Tips n tricks 3:Removing polish

Comments
Dear lacqueristas,

I'm about to share my tips n tricks regarding removing nail polish. It seems so basic, yet can be a serious pain in the bum.... glitters anyone? Ok here I go:

Basic removing
For the everyday nailpolish I like to use a acetone free remover. I like the idea that it contains less toxic ingredients. I bought an empty 1 push remover bottle by Konad that I fill with any drugstore cheap remover.
This bottle comes in totally handy because you don't have to screw open anything, you just push the lil thingy and weppa there you have a fresh nice squeez of remover. I currently use cellulose pads because they don't fluff, but I'm looking for an alternative because I don't like the way they feel.
For a basic removal of polis, I would moist my cellulose pad with a good amount of remover, place it on my nail and let it work for about 15 seconds. Then I move my pad upwards towards my free nail edge. Try not to rub in this stage! If you do, the pigments might travel their way underneath or on your cuticles and this could leave residue for days. Not pretty. Therefor I use 1 pad per finger. When I finished removing the polish from all nails, I take 1 clean pad with remover and quickly run over all nails to finish off.
Now I would wash my hands and if I want to apply fresh nail polish, I would take my acetone remover and a new pad and run it over every nail to ensure no oils or soap is left on the nail surface.

Glitters
Oh my, glitter polishes used to be my worst nightmare! If you try to take them off the traditional way (as described above) it might take you an hour! And glitters everywere! Days later I would find glitters on my carpet or couch... A true pain in the bum. But! There are a few ways to speed up things. I am not a doctor but I assume the acetone might not benefit your health so try at your own risk.

The pad/tinfoil way
 
Click on the "read more" button to check out the rest of this tutorial

Tips and tricks part 2: Polishing and cleanup!

Comments
Dear lacqueristas,
There are many ways to apply polish to your tips, here is how I like to do it.


Polishing

Preparing
Choose your workplace, I like to work on a table with a bendable lamp. I use a placemat to protect the surface of my table. Put all the products you need in front of you. I know this might be obvious, but believe me how many times I was in a hurry and scr*wed up my fresh polish by reaching for the topcoat...
Make sure your nails are oil free (wipe them with remover) and your cuticles are pushed back.


Products you might need
*nail polish remover
*cottons or pads
*Q tips or small brush ( For cleanup. Real hairs, no plastic as this might melt in aceton!)
*base coat or ridge filler
*your nail polish of choise
*topcoat
*you might want to use fast drying drops


Base coat
There are several reasons why you would use a base coat: it protects the nail from stains and discolorations, it provides the right grip for your polish, it makes applying your polish more smooth.
You can use clear base coat, tinted ones, or a special sticky base coat. Most nail hardeners are also suitable to use as a base. Be aware with highly pigmented polishes: to be sure they won't stain your nails, you can put two layers of base coat for maximum protection.
Ridgefiller is a base coat that contains small particles like nylonpowders to fill ridges and smooth out the nail plate surface. A ridgefiller typically dries to a matte finish and most have a milky white hue. If you don't have a matte topcoat but you would like to achieve a matte look for your polish, you could apply a ridgefiller instead of a topcoat. Be aware of the milky finish, it will effect the color of your nailpolish!
Another tip: If you want to apply neons, pastels or any light color, starting off with 2 layers of ridgefillers as a base helps you to achieve a blanc canvas on wich the actual polish stands out better.


Polishing
I am also still in the process of experimenting how to achieve perfect polished nails. Let me share with you what I found out so far.
You will have to mix the formula of your polish but try not to tempt yourself to shake the bottle. (if you do, let the bottle rest standing up for about 5 minutes to allow bubbles to surface) It works just fine to either roll your bottle on a flat surface, or gently swing the bottle in your hand. This way you won't get bubbles.
Now you open your bottle and thover the brush above the opening, allowing the exess polish to drip back into the bottle. It's ok if you feel like you need to scare the exess off on the bottles neck but I like to start with a bead of polish.
Now you either detect the wide side of your polish brush (OPI pro wide) or you just go ahead and place your brush right in the lower middle of your nail. If you work with a bead like me,
Click on the "read more" button to check out the rest of this tutorial

Monday, March 15, 2010

Tips and tricks part 1: my basis manicure

Comments
My manicure routine
I am currently recovering from acrylics (don't know what got into me, I should have known better...) All of a sudden I got so sick and tired of them that I decided to remove the nails myself. The pure aceton took forever and I ended up scarping and pulling off the leftovers. Hence my HUGE horizontal ridges and scruffed cuticles. Anyways, I hope you all forgive me the current state of my nails, with time I know they will get back to their original healthy state.
So, my routine manicure would be once a week. I Like to prepare everything I will need so I can totally relax and focus on my mani. Music, cup of coffee, there I go!

Click the "read more" button to check out the rest of this tutorial

OPI Hong Kong collection

Comments
Dear Laqueristas,

My very first review, and my first real post! I'm so exited to get this blog up and running! I will start reviewing my most recent purchase: some lacquers from OPI's Hong Kong collection.

Jade is the new black.
A very unique color. It is somewhat dusty and has an antique feeling. I didn't like that it enhanced the red tones in my skin. I also swatched with a matte topcoat and I loved the outcome!
Formula: cream, medium pigmented, I used 3 layers. Overall formula was fine.
Artificial light, color is a bit off, it is greener and darker IRL


Daylight, no direct sun. Color is pretty accurate.

With China Glaze Matte magic topcoat in daylight

Dim Sum Plum
A cool magenta with purple undertones. I'd say this color could flatter many skintones. One of my favourites, can't wait to do my summer pedicure with this one!
Formula: Perfect, very pigmented (one coat could do, I used two because of the macro) the lacquer glided on the nail smoothly like butter.


Daylight, no direct sunlight (please forgive my cuticles, it was a day full of swatching!)


I realize this came out blurry, but it showed the color accurately. One finger 2 layers of DSP,
other finger 2 layers of DSP and 1 layer of ChG Magic matte.


Comparing Dim Sum Plum. Click the image to see the names. The Hennes and Mauritz "fuchsia came closest but was a tiny hint more purple.


That's it for now, I hope you all enjoyed the pictures and my first post... Feel free to comment!
Hasta la vista, Laqueristas!