Site Meter
Showing posts with label matte. Show all posts

Wednesday, September 7, 2011

My latest obsession: Mattified Mannequin Manicures

53 comments
Dear Lacqueristas,

Lately I feel drawn to a weird phenomenon: the Mattified Mannequin Manicure (MMM)
I didn't come up with this concept,  I came across a pic that inspired me to experiment. It's been a couple of weeks now and I've been searching for my perfect Mattified Mannequin Manicure shade. I find it weird and wrong but so different and exiting at the same time.
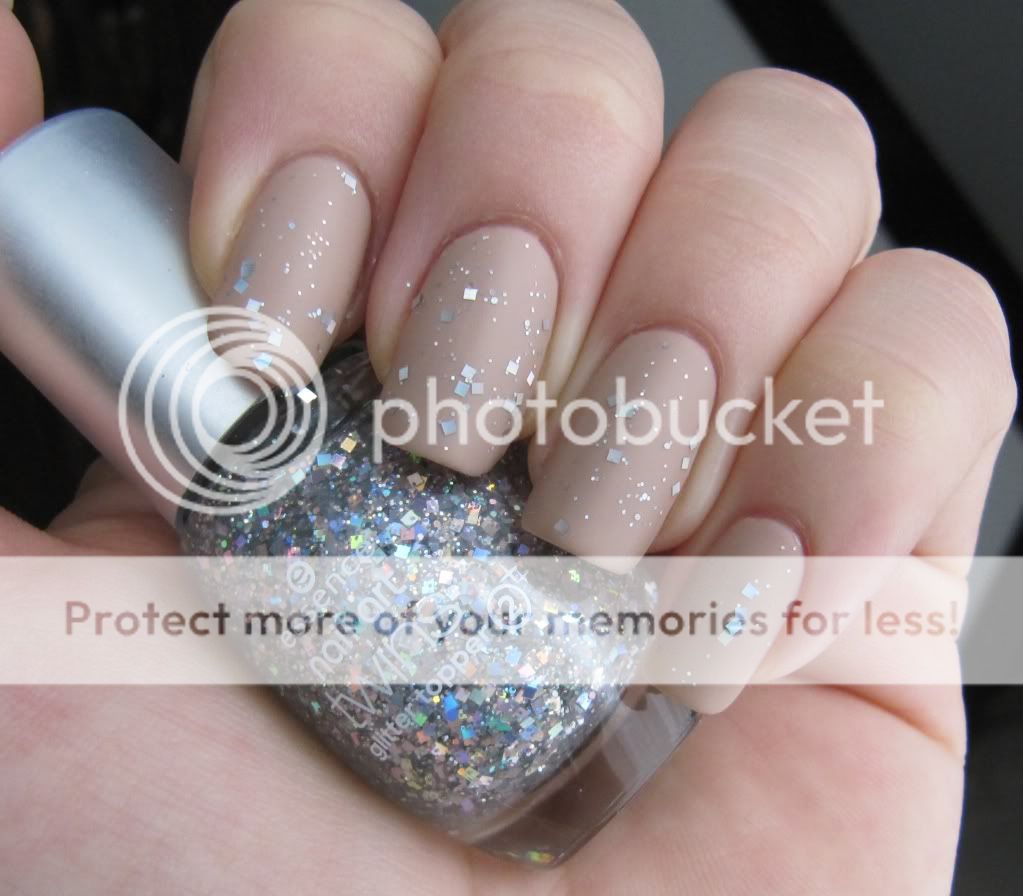
Dior Safari Beige topped with Essence Nail Art Twins Julia, mattified. Pic taken with flash.


Same manicure, in daylight
Same manicure, before I mattified.

Dior Safari Beige 
Dior Safari Beige, mattified
Try to say Mattified Mannequin Manicure 5 times and you will find your tongue in a knot. So let's just say MMM okay ;-p

I wonder which of the versions of my Dior Safari manicure you like best. The mattified or shiny one? With or without the holo hex glitters?

And have you also been intrigued by mattified mannequin hands? I keep on seeing them popping up.

Hasta la vista, Laqueristas!

Thursday, March 18, 2010

OPI Hong Kong collection-Suzi says Feng Shui

3 comments
Dear Lacqueristas,

Suzi and the lifeguard, Suzi sells sushi by the seashore, Suzi skis in the pyrenees, Suzi says da! And now Suzi says Feng Shui... Have you guys ever wondered who this Suzi is? I always did but then I never actually looked it up. I think I got the answer now... It has to be Suzi Weiss-Fischmann, the Executive Vice President and the Artistic Director of our beloved OPI. Turn out she is the one that personally creates all colors! What a PHANTASTIC job that has to be!

Anyways ladies, I promised you Feng Shui, so here we go.
A strange color, medium blue with grey undertones and a tiny brown hue very far in his genes.  A slightly tauped blue, if that makes any sense. This makes the color unique and I'm sure that if there were blue polishes in the roaring twenties, it would be Feng Shui.
The formula was great, but as you have probably read or discovered yourself, smell like hot ass.


Overcast *edit: applying polish with an OPI mini brush is only for skilled people. I'm not :-P*


Mattified with ChG magic matte. *edit: please dont click the pic to enlarge. It will cause a pain in your eye. Damn mini brushes*

How would you describe this color? I'm sure you can do better then me! Leave us a comment with your description, let's see who can nail this.


Hasta la vista, Laqueristas!

Tuesday, March 16, 2010

Tips and tricks part 2: Polishing and cleanup!

Comments
Dear lacqueristas,
There are many ways to apply polish to your tips, here is how I like to do it.


Polishing

Preparing
Choose your workplace, I like to work on a table with a bendable lamp. I use a placemat to protect the surface of my table. Put all the products you need in front of you. I know this might be obvious, but believe me how many times I was in a hurry and scr*wed up my fresh polish by reaching for the topcoat...
Make sure your nails are oil free (wipe them with remover) and your cuticles are pushed back.


Products you might need
*nail polish remover
*cottons or pads
*Q tips or small brush ( For cleanup. Real hairs, no plastic as this might melt in aceton!)
*base coat or ridge filler
*your nail polish of choise
*topcoat
*you might want to use fast drying drops


Base coat
There are several reasons why you would use a base coat: it protects the nail from stains and discolorations, it provides the right grip for your polish, it makes applying your polish more smooth.
You can use clear base coat, tinted ones, or a special sticky base coat. Most nail hardeners are also suitable to use as a base. Be aware with highly pigmented polishes: to be sure they won't stain your nails, you can put two layers of base coat for maximum protection.
Ridgefiller is a base coat that contains small particles like nylonpowders to fill ridges and smooth out the nail plate surface. A ridgefiller typically dries to a matte finish and most have a milky white hue. If you don't have a matte topcoat but you would like to achieve a matte look for your polish, you could apply a ridgefiller instead of a topcoat. Be aware of the milky finish, it will effect the color of your nailpolish!
Another tip: If you want to apply neons, pastels or any light color, starting off with 2 layers of ridgefillers as a base helps you to achieve a blanc canvas on wich the actual polish stands out better.


Polishing
I am also still in the process of experimenting how to achieve perfect polished nails. Let me share with you what I found out so far.
You will have to mix the formula of your polish but try not to tempt yourself to shake the bottle. (if you do, let the bottle rest standing up for about 5 minutes to allow bubbles to surface) It works just fine to either roll your bottle on a flat surface, or gently swing the bottle in your hand. This way you won't get bubbles.
Now you open your bottle and thover the brush above the opening, allowing the exess polish to drip back into the bottle. It's ok if you feel like you need to scare the exess off on the bottles neck but I like to start with a bead of polish.
Now you either detect the wide side of your polish brush (OPI pro wide) or you just go ahead and place your brush right in the lower middle of your nail. If you work with a bead like me,
Click on the "read more" button to check out the rest of this tutorial

Monday, March 15, 2010

OPI Hong Kong collection

Comments
Dear Laqueristas,

My very first review, and my first real post! I'm so exited to get this blog up and running! I will start reviewing my most recent purchase: some lacquers from OPI's Hong Kong collection.

Jade is the new black.
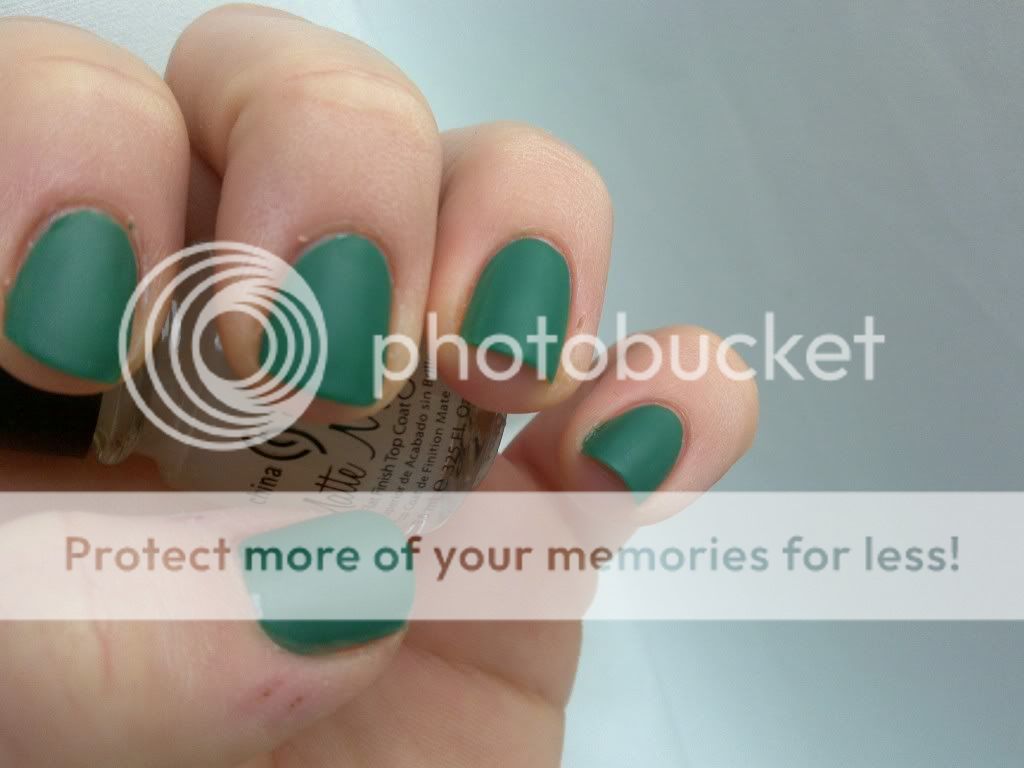
A very unique color. It is somewhat dusty and has an antique feeling. I didn't like that it enhanced the red tones in my skin. I also swatched with a matte topcoat and I loved the outcome!
Formula: cream, medium pigmented, I used 3 layers. Overall formula was fine.
Artificial light, color is a bit off, it is greener and darker IRL


Daylight, no direct sun. Color is pretty accurate.

With China Glaze Matte magic topcoat in daylight

Dim Sum Plum
A cool magenta with purple undertones. I'd say this color could flatter many skintones. One of my favourites, can't wait to do my summer pedicure with this one!
Formula: Perfect, very pigmented (one coat could do, I used two because of the macro) the lacquer glided on the nail smoothly like butter.


Daylight, no direct sunlight (please forgive my cuticles, it was a day full of swatching!)


I realize this came out blurry, but it showed the color accurately. One finger 2 layers of DSP,
other finger 2 layers of DSP and 1 layer of ChG Magic matte.


Comparing Dim Sum Plum. Click the image to see the names. The Hennes and Mauritz "fuchsia came closest but was a tiny hint more purple.


That's it for now, I hope you all enjoyed the pictures and my first post... Feel free to comment!
Hasta la vista, Laqueristas!